Building Your First Entity
To begin writing logic that controls your button or your hero we need to link Entity classes to their graphical counterparts in the UI. (This is similar to linkages in Flash CS5, if you're familiar with that concept.)
Creating a Button Class
-
Create a new AS3 file components/StateButton.as:
package SampleProject.components { import gamecheetah.Entity; public class StateButton extends Entity { } } -
In your Main.as add the following code:
package SampleProject
{
    import gamecheetah.Engine;
    import SampleProject.components.StateButton;

    public class Main extends Engine
    {
        public function Main()
        {
            super(60);  // Launch game at 60 fps
        }

        override public function onEnter():void
        {
            Engine.registerEntity(StateButton);
        }
    }
}
This tells the library that you want to use this class in the designer UI.
Creating the Button Graphic
-
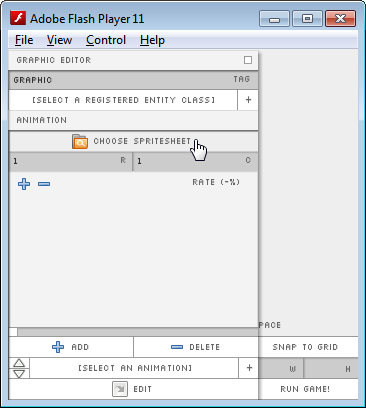
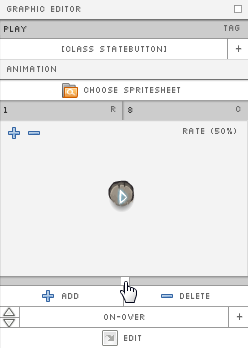
Run your project and go into the designer UI. Under the topleft Graphic menu click Add. Next, select the Graphic from the drop down and click Edit. This should bring up:
-
Click Choose Spritesheet and pick a sprite sheet for your button.
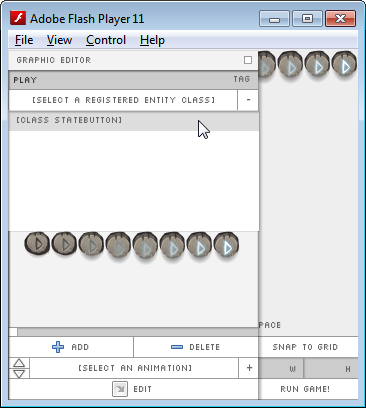
- Lets name our button: "play". Any Graphic Tag you enter will be automatically be converted to lowercase for consistency (and partly because the designer-font only has uppercase).
-
Now, let's link our StateButton class to our "play" Graphic. Click on the drop-down and select the class we just registered:
-
Depending on the spritesheet used, set the number of rows and columns in the fields labelled R and C.
Animating your Graphic
-
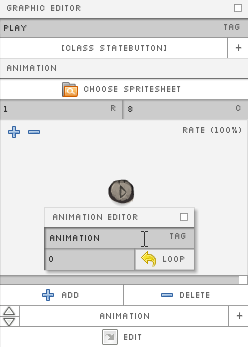
Notice the bottom menu buttons, click Add to add an animation. Use the drop-down to select the newly created Animation. After selecting the animation, click Edit and a pop-up dialog should appear:
-
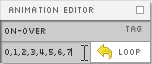
Specify the name of the animation, and the sequence of frames you wish to play separated by commas. Click Loop to toggle animation looping.
-
Your animation will probably play too fast at 60 fps. To slow it down, click and drag the slider above the Add and Delete buttons (Note: you can set a frame-rate per animation):
Saving and Loading your Resources
-
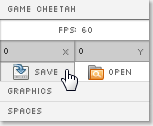
In the top left menu select Game Cheetah. Click on Save and choose a location to save your current data.
-
For convenience, add the following to Main.as to automatically load your resources everytime you run your project: package SampleProject { import gamecheetah.Engine; import SampleProject.components.StateButton;
public class Main extends Engine { // Embed assets to automatically load resources on building SWF. [Embed(source = "resource.amf", mimeType = "application/octet-stream")] private static var Assets:Class; public function Main() { super(60); // Launch game at 60 fps } override public function onEnter():void { Engine.registerEntity(StateButton); // Load resource file. MUST be AFTER registerEntity()! Engine.loadEmbeddedFile(Assets); } } }- The source path depends on where you saved your data. In this example, the .amf file is saved under src/SampleProject:
